Monday, August 24, 2009

Improved note book

While walking around Michaels I found these cute little wood note books for a dollar. I bought three and decided to make me a "To Do" note book.
First step: Glue your choice of paper on the back and front.


Add any embellishment you like:

I am obsessed with inking everything I do now. I used to use chalk, but my sister Amy told me how fabulous ink works. I love it! It is not near as messy as chalk and you get more definition.


I just inked around the edges:


Last step was to Modge Podge the whole thing. (Love modge podge!). Then I added some ribbon to the rings and done!


Also at Michaels I found this cute little paper clip holder thingy on clearance (yeah!) for 89 cents. I painted it, added some paper and modge podged it. Cute!

One thing I have been meaning to post is these great magnet boards. My sister Amy had one, and I had to make some. My dad hooked me up with a huge piece of sheet metal which I took over to the school and cut up into pieces. Then I added two different pieces of paper, slapped on some ribbon, a flower, and some letters. Then I used my Cropadile and punched some holes in the sheet metal, added some eyelets and hooked up some ribbon. Cutest project ever! I have it hanging above my craft table.


Note: I used Terrifically Tacky Tape to attach my paper to the sheet metal. This stuff is fantastic!!! I use it any time I want things to really stick. This stuff is unforgiving though, so if you stick it somewhere, you better want it to stay.


Friday, March 20, 2009

Mail Sorter

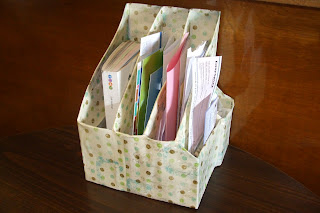
I got the idea for this craft from the Masked Mommy blog. I've been wanting something to feel more organized with all the stuff we just throw on the counter, but I didn't want to spend tons of money on something that didn't fit my needs very well, so I made my own. It definitely has it's funny quirks (the side is quite wavy), but I'm still loving it!

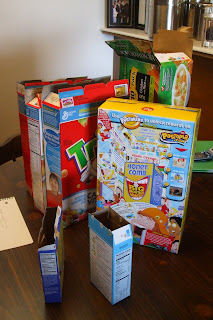
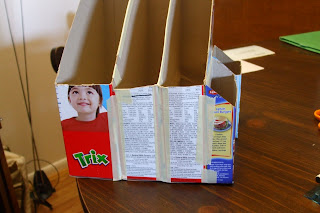
I started by collecting a bunch of boxes in a variety of shapes and sizes.

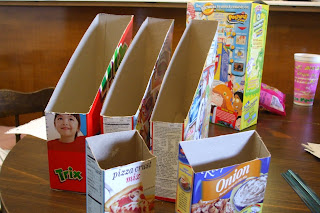
Then I really figured out what exactly I wanted/needed and I designed the sorter and cut the boxes down to size.

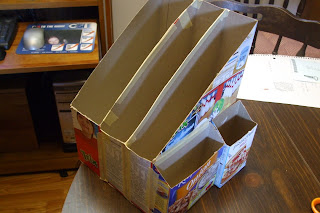
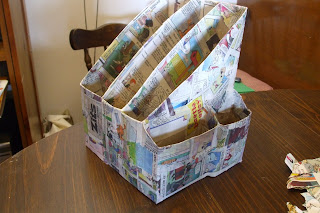
Next I taped the boxes together (you have to use masking tape for this, so the paper mache will stick to it).

I paper mached the sorter. This helps it be sturdier. Check out The Masked Mommy for instructions and tips on doing this.

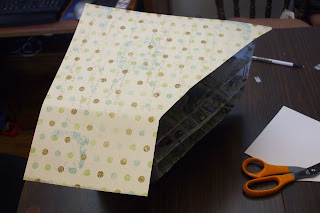
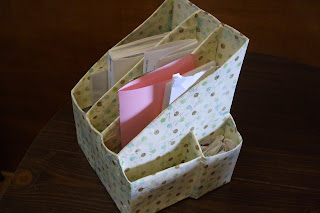
The Masked Mommy painted her sorter, but I wanted this specific paper because it matches my kitchen. I mod podged it all on. I'm not going to lie, this took forever (2-3 hours) because I only had a few pieces of the paper I wanted (and Michael's doesn't sell it anymore :( ), so I really had to figure out how to make it stretch.

All done! I love this thing (have I said that already?)! Joel and I each have a big slot to use for whatever we want, there's a little slot for receipts and one for other random little things we always seem to have around, and one big slot left for our entertainment book and other coupons and gift cards. I feel so organized with it!

Thursday, January 29, 2009

Serving Trays

I found this idea on http://www.craftynest.com/2008/12/salvaged-cupboard-door-serving-tray/

What you need:
Old cabinet door
Paint
Two handles
Optional: Vinyl or stencil design
How to do it:
Paint a old cabinet door.
Add design
Add handles.
Easy as pie, you have a serving tray. Me and my sister Mandy (hopefully she will post her tray soon) have had lots of ideas of what to do with the fifty old cabinet doors my dad gave us. As soon as we do some of those projects we will post them.

Valentine Blocks


What you need:
2 by 4 piece of wood
Paper
Ribbon
Glue
Scissors
Two X's and two O's (I used my cricut)
How to do it: Cut the 2x4 into 4 blocks. Two of them should be about 6 inches long and the other two should be about 3 1/2 inches long.
Cut out the paper, glue it on. Glue your letters on. Add embellishments. Place ribbon on the side of the blocks.

Monday, January 5, 2009

Gift Box

What you need:
Cardboard box. I got mine from Heartland Paper for $3.59
Paper: I used about 4 sheets total.
Glue
Pencil
Scissors
Other embellishments

Lid: Place lid on sheet of paper. Glue down. Trace edges. Cut. Then glue them down.


Do the same to the box. You may have to wrap it a couple of times.


Add embellishments and done!